Root your unit
Introduction
As the Sofia 3GR units are Intel units running x86 Android and the Rockchip PX5 units are ARM64 units running ARM64(/ARM8/ARM7/ARM) Android, we can't use the same software. So read the correct instruction for your Sofia unit or PX5 unit.
(At this moment Joying sells the Intel SC9853i units. These units require a totally different way of rooting. See the XDA forum thread HowTo: Root Joying SC9853i Head Unit and download the developer.zip. It contains everyhing you need, including an extensive Readme.)
On Android 6.0.1 and Android 8.0.0 rooting requires 2 steps:
- First you need to "enable adb over wifi" which must be done on your Sofia 3GR or PX5 head unit, using my apk.
- After that you need to do the rooting itself from your pc/laptop.
On Android 5.1.1 (only relevant for the Sofia unit) you only need to do the rooting part on the laptop/pc.
Note: If your wireless network has a 2.4GHz and a 5GHz network, make sure your pc/laptop is on the 2.4GHz. Your unit only works on 2.4GHz and from experience I know that when your pc/laptop is on 5GHz, you often can't connect, or you get a message like "device off-line" (technically this is complete nonsense. Your router should route fine between 2.4GHz and 5GHz but still it is more prone to issues, than with both units on the same frequency.)
On your head unit
- If you did not already downloaded my Joying Extra Tools apk, you should now download it from the Releases page onto your head unit.
When you start the apk you will see the following screen:
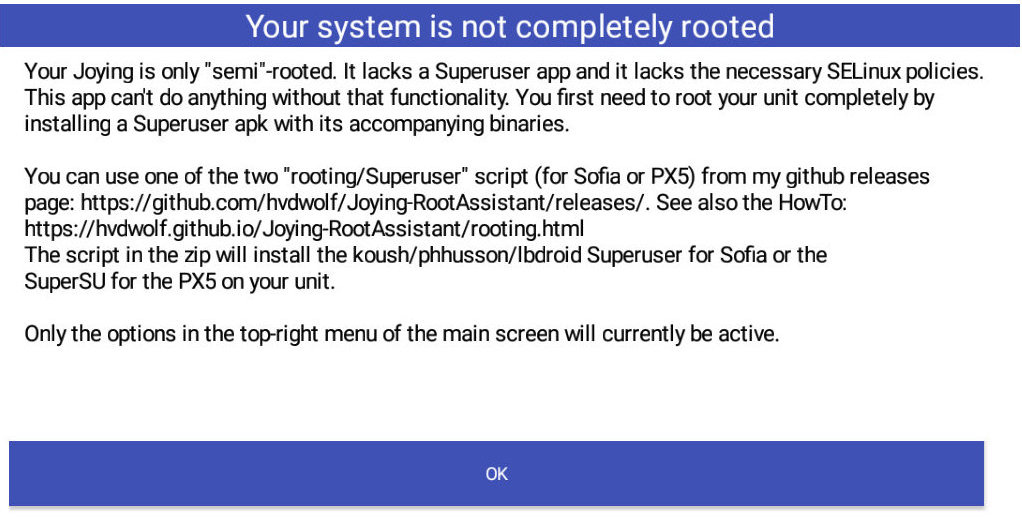
Your unit is not fully rooted. You already knew this otherwise you would not try to root it. Simply press OK.
- Next you will see:
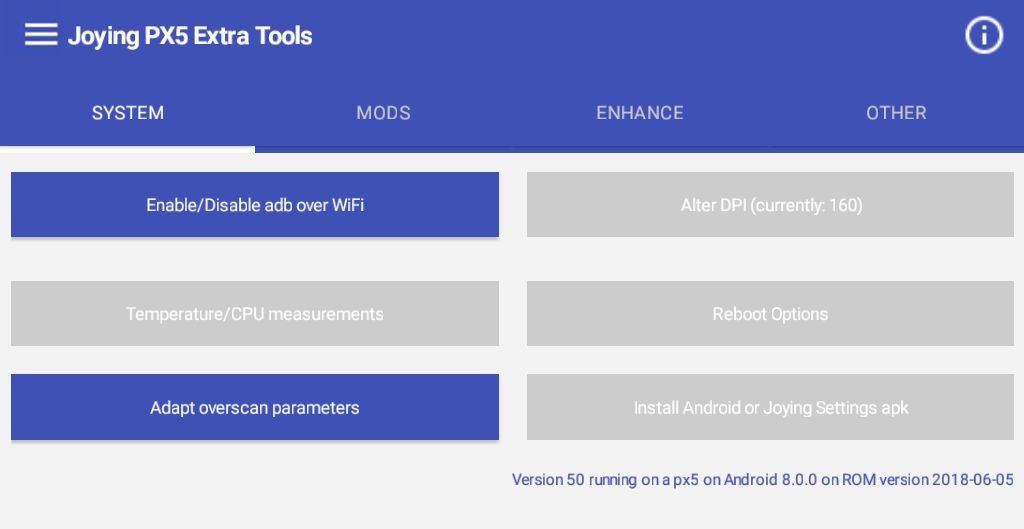
On Android 6.0.1 and Android 8.0.0, adb over wifi is by default disabled. To root your unit you need to have adb over Wifi enabled.
Use the button "Enable/Disable adb over WiFi".
You will get a popup with a short text and a line with "The current setting is:". If it is enabled, you don't have to do anything.
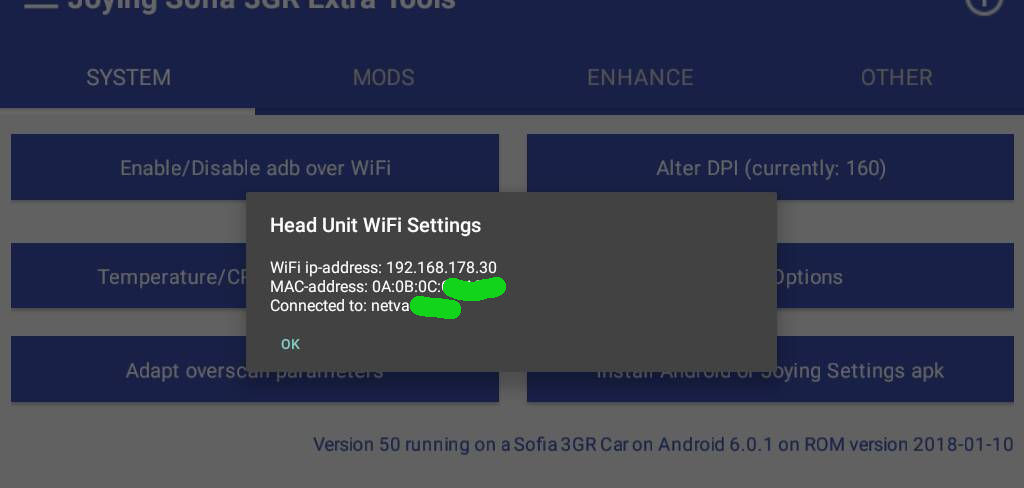
- Now you need to know the ip-address of your head unit. Tap the top-left menu button
 and select the option "My WiFi address". and select the option "My WiFi address".
You need the ip-address for the script on your laptop/pc.
You will see something like this:
On your pc:
Linux only: First install adb via your package manager (like on Ubuntu/Debian like distributions: "sudo apt-get install adb")
Steps on the Sofia 3 GR Intel units:
- Download the Superuser install script from the Releases page onto your pc/laptop. It's called Superuser-Sofia3GR-Intel.zip.
If you have SuperSU (still) installed, you need to flash your unit first with a Joying firmware ROM to have a "clean" base of install. Note that this is only necessary if you want to use Xposed.
- Reboot your unit before you start! My experience is that the adb daemon and/or tcpip stack is not so stable after multiple sleep/wake cycles.
- Unzip the Superuser-Sofia3GR-Intel.zip somewhere on your pc/laptop.
- On Windows: Run CMD.exe as Administrator.
- On Linux like OSes: Open a terminal.
- Change to the folder where you unzipped the files and change to the folder where the install.sh and install.bat are located.
- On Windows: Run the install.bat script with the IP address of your Head Unit as a parameter: install.bat 192.168.178.50 (for example)
- On linux: Run the install.sh script with the IP address of your Head Unit as a parameter: ./install.sh 192.168.178.50 (for example)
(If necessary please do a "chmod +x install.sh" first if your script is not executable.)
- Wait until the script finishes.
- Reboot your Head Unit.
- When asked: DO NOT update the su binary. It will soft-brick your unit requiring a reflash with a new firmware ROM.
|
Steps on the Rockchip PX5-A53 ARM units:
- Download the Superuser install script from the Releases page onto your pc/laptop. It's called SuperSU-PX5-ARM.zip
- Reboot your unit before you start! My experience is that the adb daemon and/or tcpip stack is not so stable after multiple sleep/wake cycles.
- Unzip the SuperSU-PX5-ARM.zip somewhere on your pc/laptop.
- On Windows: Run CMD.exe as Administrator.
- On Linux like OSes: Open a terminal.
- Change to the folder where you unzipped the files and change to the folder where the copy_install.sh and copy_install.bat are located.
- On Windows: Run the copy_install.bat script with the IP address of your Head Unit as a parameter: copy_install.bat 192.168.178.50 (for example)
- On linux: Run the copy_install.sh script with the IP address of your Head Unit as a parameter: ./copy_install.sh 192.168.178.50 (for example)
(If necessary please do a "chmod +x copy_install.sh" first if your script is not executable.)
- Wait until the script finishes.
- Reboot your Head Unit.
- When asked: DO NOT update the su binary. It will soft-brick your unit requiring a reflash with a new firmware ROM.
|
You should now have the Superuser application working. This will allow you to give other apps root access as well. It also allows you to use my apk to install several mods and the Xposed framework.
|